Two recipes from Root to Leaf for the NY Times

image98.jpg

I'm quite late posting this one, but I photographed these delicious recipes for the NY Times back in March. They come from Steven Satterfield's book, Root to Leaf. It's such a great book and offers many delicious recipes for your farmer's market finds throughout all four seasons. After shooting the radish sandwiches with butter and salt and the creamed rice with english peas and country ham we enjoyed them both for lunch. Delish!

Click here for Sam Sifton's article and then click here and here for the recipes!

image237.jpg
image321.jpg
image587.jpg
image388.jpg
image428.jpg

Photographing Crafting a Colorful Home

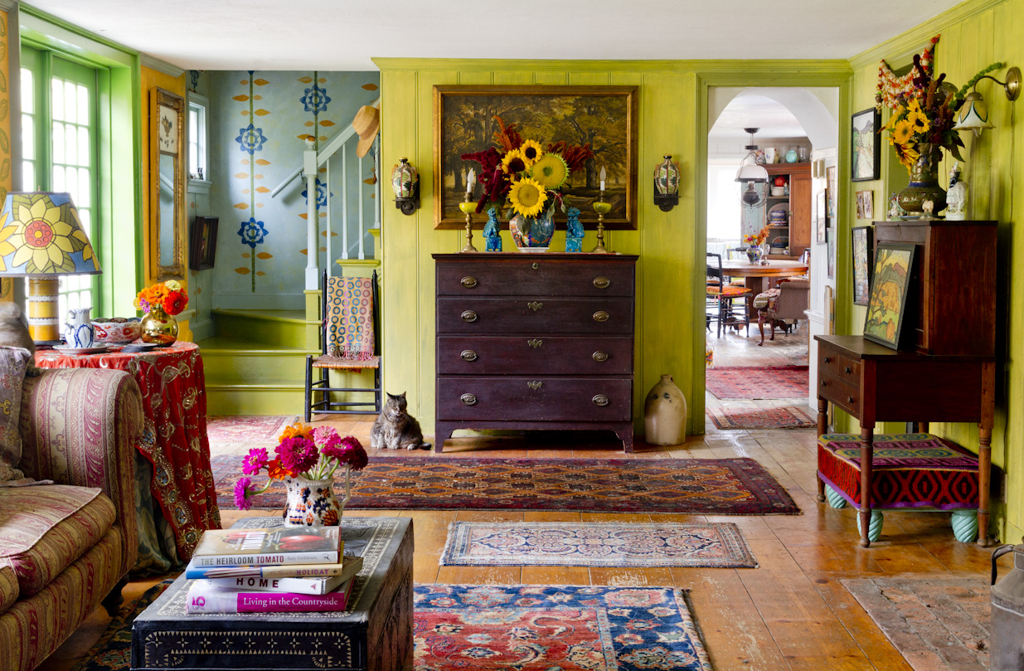
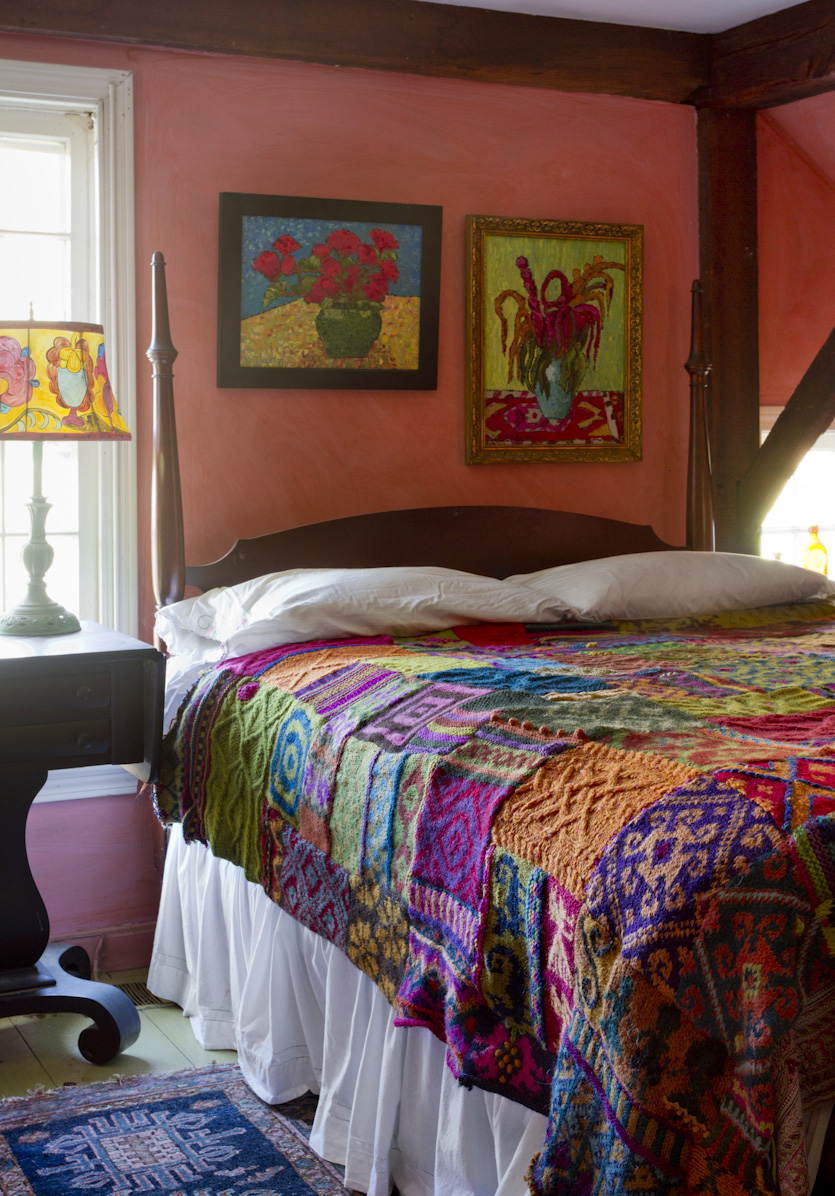
Some outtakes, uncropped images and my favorites from Kristin Nicholas's, Crafting a Colorful Home

image299.jpg

When people see Kristin's home they usually have one of two reactions, woah I love it, or woah that's not my style. The first time I saw it, I was in photo school and was using Kristin's beautiful outdoor landscape as a backdrop for a shoot for my final portfolio. It was a busy time in all our lives, so admittedly, I had tunnel vision the first time I was in Kristin's home. I walked in quickly with my friend, Sarah, I used the bathroom, we played with one of the little lambs that was being bottle fed, chatted for a few moments in the kitchen, then went back outside to work. I didn't get to explore the house or really notice anything different about it. At that point I had no idea that for the next few years I'd be spending a lot of time in this place.

image431.jpg
image124.jpg
image184.jpg

A few months after I graduated from school I started working for Houzz, I was talking with Sarah to see if she knew of any good homes I could feature and Kristin's name came up (Sarah was obviously a lot more observant than I that first day we saw her home!). So, almost a year after graduating we went back to Kristin's home and that's when my eyes were finally opened up to her world of color. And this time my reaction was a bit different. I explored into some of the other rooms and I realized it was the most unique place I had ever seen and immediately I thought, how am I going to photograph this to portray the beauty and unique-ness?! I saw it as a masterpiece, a work of art, which is exactly what it is. An artist's home is their blank canvas and Kristin has transformed hers into some of her most amazing work.

image244.jpg
image456.jpg
image549.jpg
image495.jpg
image258.jpg

When people see the photos of Kristin's home they always ask me, what is she like? I got to know Kristin and her home really well as we continued to work together. To describe her I'd say she's down to earth, realistic, bold, honest, to the point, eager to learn, extremely hardworking, kind, accepting, humble, strong, confident and animated. She's worked in the creative world all her life. She went from working for a large creative company to being her own boss as a freelancer. She's dabbled in almost every art form I can think of and has fine tuned her eye for years. Kristin is amazing.

image491.jpg
image154.jpg
image606.jpg
image492.jpg
Photographing crafting a.._1.jpg

When those first photos we took of her home went up on Houzz, those two reactions that I mentioned earlier came out of the readers like fire and ice. Her home went viral and caused such controversy that it blew us away. Some people were all for it, others admitted it wasn't for them but still appreciated it and then there were others whom flat out disliked it. Houzz is known for having readers who speak their minds without a filter but I wasn't quite prepared for the arguments that were to follow in the comment section. Those whom didn't like it were saying appalling things, and even accused Kristin of needing psychiatric help (yeah, some people are just plain rude). Retaliation was quick on the draw by those who simply adored Kristin's home and fearless use of color and pattern. The arguments went on and on so much that these comments had to be monitored, the internet is a crazy place. Needless to say, her home truly moved and impacted a lot of people.

image223.jpg
image559.jpg
Photographing crafting a.._3.jpg
image348.jpg

Months after the bang and boom Kristin's home made on the internet she brought this idea of a guide to decorate your home with color to her book agent, Linda, and they put together a proposal for publishers. Next thing we knew, Roost Books picked it up! I remember when I got the phone call from Kristin, it was a quiet day, mid-December and she sounded really excited when I answered the phone. Once she told me it was approved and that she wanted me to photograph her book I could not stop smiling. It was probably one of the most exciting moments of my career.

image136.jpg
image571.jpg
image234.jpg

Ten months later we started shooting. Another question I get asked often as people are thumbing through the book is: how long did it take you to shoot this? Six days. That usually shocks people. And then I tell them, six looonngg days. Six creatively and physically strenuous days. But they are six of my favorite days.

We split the shoot up into two blocks of three days. One block in September and one block in October. The first block we worked on most of the DIY projects and intro photos, as well as the sunflowers and garden because they were in full swing. We had help on one day out of the three but for the most part it was just the two of us and it worked out really well (luckily we weren't moving too much furniture around this time). We collaborated and bounced ideas off of each other and got to chat a lot. It was very fun. For the second block Sarah came along with me. It was wonderful having her help. We shot the full room shots this time and these called for a lot of furniture moving and styling. I'd say that these shots were my favorite because I love how Kristin is up for anything. She let us rearrange her home and pull different pillows, fabrics, books, everything and anything out of her shelves to make the shot. This was probably the 4th or 5th time I've shot her house so it was a good challenge to see how we could get different angles and styling. I had a blast. And we couldn't have asked for more perfect, picturesque, New England, fall weather. The trees were so beautiful and the temp was just right- not too cold and not too hot. With all the color inside and all the color outside it was incredibly inspiring.

image330.jpg
image324.jpg
image103.jpg
(Pictured Above: Uprooting and moving sunflowers to bring them in for the next two shots below. The fun part of styling!)

(Pictured Above: Uprooting and moving sunflowers to bring them in for the next two shots below. The fun part of styling!)

Photographing crafting a.._4.jpg
image346.jpg

After we wrapped everything up and celebrated, I went home and edited all the photos and turned them in (over 300 images) within the next couple weeks. At this point it was November of 2013. Many months later, around Easter, we got a rough PDF copy of what the book was like, this really got me excited. I think I saw it one more time as a PDF before it arrived to me in December 2014 all finished, printed and looking beautiful...two years after I got that phone call from Kristin.

Photographing crafting a.._2.jpg
image101.jpg

Crafting a Colorful Home came out in stores, officially, on January 20, 2015. Luckily enough, I was speaking at the Alumni Roundtable at my school that exact day so I got to swing over to Kristin's the next day. We spent it together, celebrating our labor of love, going through page by page saying things like, "I wonder why they cropped this photo like that" and "Oooo I love this page!" and "Remember what we had to do for this shot!". And of course, as always, scheming up our next project together!

image349.jpg

You can read about Kristin's process of writing this book here. The process is truly amazing and I'm so happy she shared what she goes through as an author.

If you like what you see here, you can order Crafting a Colorful Home through Kristin by clicking here or through Amazon by clicking here.

Most of these photos are outtakes that didn't make it into the book and uncropped images from the book so there are a lot more colorful shots and DIY projects to explore. Oh, and before I forget...yes the kitten on the cover is real!

Some really quick thank you's:

My photo school and all the instructors who taught me, thank you (and for being located in the middle of nowhere Massachusetts which led me to Kristin!). Shelley, thank you for letting me stay with you while I shot this and for cooking me delicious meals- I had a great time with you. Thank you Linda for making this happen and Beau for coming to help us shoot for a day. Thank you Jenn at Roost (and the whole team who worked on this) for being the nicest and easiest editor to work with, ever. The whole Houzz team for giving me the platform to share Kristin's home and help pave the way for this book. All my family and friends for their encouragement about my photography and this book. A huge thank you to Kristin for believing in me and letting me photograph this book, for being a wonderful lady to work with (seriously, I love working with you), a huge inspiration and most importantly a wonderful friend. I can't wait to see what else we can do together. And of course, another huge thank you to Sarah. Without you this would have never happened. Thank you for being such a great friend (more like a sister) during photo school and still to this day. All your support and love means so much. And thank you for introducing Kristin and I, which essentially made this all possible, and for helping us on all these shoots. Couldn't have done this without you!

Garlicky Zucchini Noodles

image466.jpg
image323.jpg

March is the month that I am always obsessed with the color green...it's only natural after all these months of hibernating. Winter is dragging on and things are gray and muddy and I am craving spring and all the color that will soon bloom. It can't come fast enough. But at the same time that I want spring to hurry up and get here, I stop for a moment and think holy crap, the month of March is halfway through already, where is this year going? Why can't time slow down?!...I swear this happens every year in March, right about now. You'd think at this point in life I'd be accustomed to it, but no.

In order to deal with this 'seasonal, time is moving too fast, but not fast enough' distress I start cooking with lots of green foods, which isn't the worst thing in the world being that most green foods are healthy for you. I love the hue, it's so bright, airy and calming. My aunt gifted me a spiralizer for Christmas and a couple weeks ago she sent me a clipping of this recipe in the mail. I've never put these ingredients together before so reading the recipe I was really interested to see how they would all taste together. Well let me tell you, they're marvelous. So marvelous that we're taking this to dish to Pennsylvania to share with our family at Easter. It's perfect for this gap between winter and spring that they so call March. It's light but filling, easy to whip up and a beautiful shade of green to get you in the mood for the nice weather that's to come.


image473.jpg
image100.jpg

Garlicky Zucchini Noodles

2 medium zucchini, trimmed

3 Tablespoons walnut or olive oil

6 cloves garlic, smashed, peeled and halved lengthwise

1/2 cup walnut pieces

1/4 teaspoon crushed red pepper

4 thin slices prosciutto, torn

1 medium tart green apple, cored and thinly sliced

4 oz. soft goat cheese


Using a spiral vegetable slicer, cut zucchini into long thin noodles. Cut noodles into smaller strands, if desired. In a very large skillet heat 2 Tablespoons of the oil over medium-high heat. Add garlic. Cook, stirring constantly, 2 minutes or until just starting to brown. Add zucchini; cook and toss with tongs for 1 minute. Transfer to a serving bowl. Add walnuts to skillet; cook and stir 1 to 2 minutes or until toasted. Add to bowl with zucchini. Add 1/2 teaspoon kosher salt and crushed red pepper; toss to coat. Add remaining oil to skillet. Add prosciutto. Cook 1 minute or until browned and crsip, turning once. Add to zucchini mixture along with apple; toss to combine. Top with goat cheese.

Recipe from Better Homes & Gardens


image126.jpg

Red Raspberry Pie

Raspberry pie_1.jpg

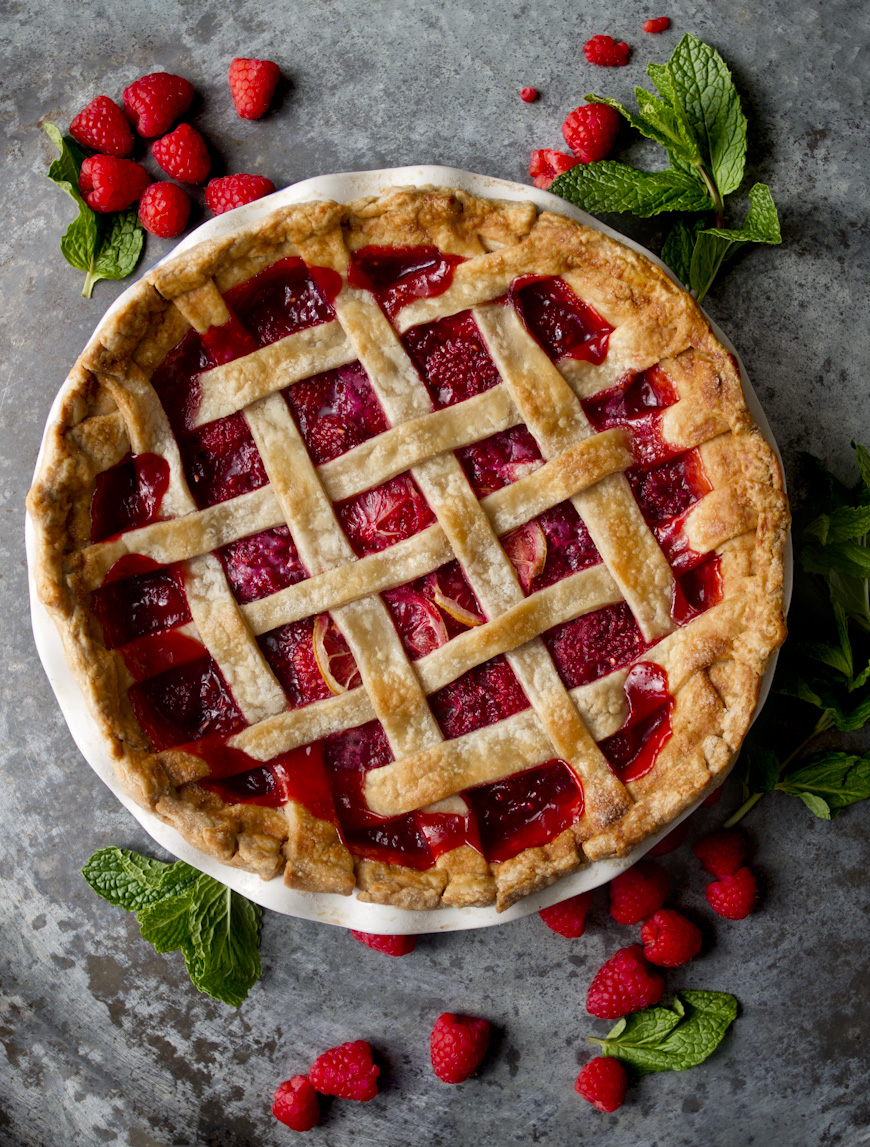
Would you believe it if I told you that this is the first lattice pie I've ever made? That's a little embarrassing for me to admit, especially as a food stylist. But seriously, I've never had a job that called for this. I've done just about evey other kind of pie I can think of, but never the lattice.

So, pie day was my excuse to challenge myself and try something new. And the verdict: I loved it! It was so much easier than I thought it might be, working with dough isn't my favorite thing in the world so I was pleasantly surprised. Lattice may just be my new way to top pies.

Raspberry pie_3.jpg
image138.jpg

But enough about the lattice and more about these big, juicy raspberries. I love raspberries, they are my favorite berry and quite possibly my favorite fruit. They can be tart or sweet or both! And that's the best part about this pie, it starts out a little tart, then finishes nice and sweet...all balanced out by the buttery crust. Everybody has their favorite pie crust so use the one you like, fill it up with the raspberry and Creme de Cassis mixture, then get artsy and seal it with some lattice.


Happy (almost) pi(e) day!

image309.jpg
Raspberry Pie_2.jpg

Red Raspberry Pie

4 cups raspberries, picked over

1 cup granulated sugar

1/3 cup Creme de Cassis

4 Tablespoons cornstarch

1 Tablespoon fresh lemon juice

pinch of salt

1 recipe of your favorite pie crust

2 Tablespoons butter

3 paper thin slices of lemon


Preheat oven to 425 degrees F. Toss raspberries and sugar together in a mixing bowl. Whisk Cassis and cornstarch together in a small bowl until smooth. Stir Cassis mixture, lemon juice and salt gently into berries. Roll out two thirds of the pie dough and line the pie pan; leave edges untrimmed. Spoon in berries, dot with butter and arrange lemon slices overlapping slightly in the center of the berries. Roll out remaining pie dough into a 10-inch round and cut into 1/2-inch strips. Arrange over berries in a lattice pattern and crimp edges decoratively. Set on the middle rack of the oven and bake for 15 minutes. Lower heat to 350 degrees F and bake for another 30-40 minutes, or until crust is golden brown and filling is bubbling.


image211.jpg

Pie's Cousin

image465.jpg

I'm getting super psyched for pi(e) day! I'm not a fan of math, at all, but I am a huge fan of the other type of pie and I'm getting ready for 3.14.15 with pie's cousin, a tart. I was thumbing through my Martha Stewart's Pies & Tarts book and stopped on this recipe. Chocolate, almonds, honey and fleur de sel. Such a perfect set of ingredients, especially when melted, toasted and topped on a flaky, crusty, gold puff pastry. I think the best part about this tart is that unlike a lot of pies, it takes a matter of minutes to prep and make, it's so easy and unfussy. Two qualities I look for in my desserts.

image374.jpg
image450.jpg
image459.jpg

I love how this tart looks so rustic and has such a great variety of textures. Smooth, melted chocolate, toasty and crunchy almonds, sticky honey and lightly crisped flakes of puff pastry. I thought I'd prefer to eat this warm right out of the oven, but I was pleasantly surprised the next morning when I ate a piece. With the cooled, jelled chocolate it was just as good. But my very favorite method of eating this dessert is aside a nice scoop of chocolate ice cream.


image94.jpg
image192.jpg

Chocolate-Almond Tart with Fleur de Sel

1 box store-bought puff pastry, thawed

1 egg, lightly beaten

Sanding sugar

2 ounces semi-sweet chocolate

Honey, for drizzling

Fleur de sel, for sprinkling

2 Tablespoons toasted almonds, coarsely  chopped

Unfold dough on a parchment-lined rimmed baking sheet. Trim the edges, if needed, to form a 10-inch square and fold in each edge to form a 1-inch border. Pierce center of the shell all over with a fork. Brush edges with beaten egg and sprinkle with sanding sugar. Refrigerate until firm, about 30 mins.

Prehet oven to 450 degrees F. Bake until pastry is puffed and golden brown, 15-20 minutes. Using an offset spatula, press down on middle of shell (leave border puffy). Cover center evenly with chocolate. Drizzle with honey and sprinkle with salt. Return to oven and bake just until chocolate is melted, about 2 minutes. Sprinkle with almonds and cut into 4 squares. Serve with ice cream, if desired, and drizzle with more honey.


image577.jpg
image326.jpg

Chocolate Chip Red Velvet Muffins

image605.jpg

Chocolate and red velvet...two of my favorite things. Because of this, it's safe to say Valentine's day is my kind of holiday. An excuse to eat these sweets for a solid week? Yes please! Sweets aside though, I must admit I do love all the red and pink hearts, roses and fun little Valentine crafts that come along with this holiday. A day set aside to show all your loved ones how much you care about them is always welcome here, whether it's with roses, chocolates, words or a homemade treat like these muffins.


image151.jpg
image281.jpg
image589.jpg

Chocolate Chip Red Velvet Muffins

3 Tablespoons unsalted butter

2 ounces bittersweet chocolate

2 cups whole wheat flour

1/3 cup cocoa powder

2 teaspoons baking powder

1/4 teaspoon salt

1/8 teaspoon baking soda

2/3 cup sugar

3/4 cup milk

1/2 teaspoon vanilla

1 ounce red food coloring

2 large eggs

1 1/2 cups chocolate chips


Preheat oven to 425 degrees F. In a double boiler melt butter and chocolate until smooth. Let cool to room temperature. In a large bowl, combine flour, cocoa powder, baking powder, salt and baking soda; whisk. In a separate bowl, stir together sugar, milk, eggs, vanilla and food coloring until combined. Pour chocolate mixture and milk mixture into flour mixture and stir until just combined. Gently fold in chocolate chips; batter will be sticky. Fill 12 muffin cups with batter. Bake for 5 minutes, reduce oven to 375 degrees F and bake for 10 minutes or until tested with a toothpick. Let muffins cool in pan 5 minutes before removing to a cooling rack.


A Taste of Winter

image481.jpg
image264.jpg

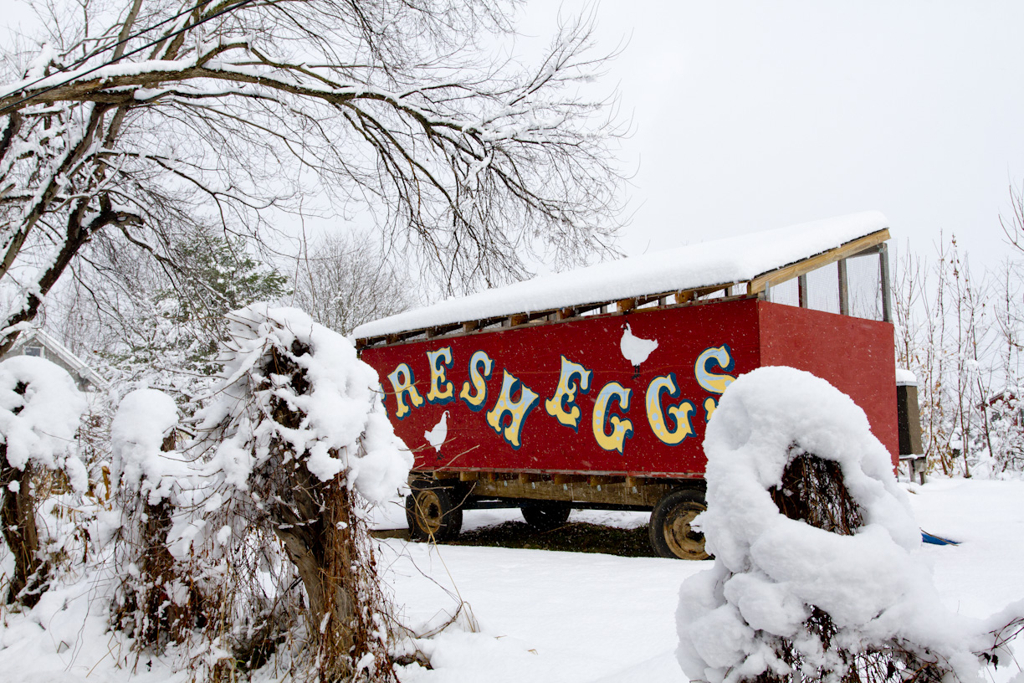
One thing I truly enjoy about winter are the beautiful snowy scapes it brings along with it. We haven't seen too much snow  so far but the storm that happened over Thanksgiving was so stunning that I have to share these photos with you. This is one of my favorite spots, Sprout Creek Farm, looking like a snowglobe.


image627.jpg
image275.jpg
image201.jpg
Taste of winter_2.jpg
image351.jpg
image357.jpg
image406.jpg